Supabase - Edge Functions
5 min read
·
required:
- Supabase CLI
- Deno
- Docker
- Next.js
- Typescript
- Postman
What is Supabase?
If you’re not sure what Supabase is, you can find out on their website. They define it like this:
Supabase is an open source Firebase alternative.
Start your project with a Postgres database, Authentication, instant APIs, Edge Functions, Realtime subscriptions, Storage, and Vector embeddings.
If you want to know more about Supabase, check out https://supabase.com/
What are Supabase Edge Functions & how do they work?
And they’ve defined the Edge Functions like this:
Edge Functions are server-side TypeScript functions, distributed globally at the edge — close to your users. They can be used for listening to webhooks or integrating your Supabase project with third-parties.
These functions run custom logic on the edge, closer to where data is consumed. This reduces latency and improves performance for global apps.
What are we going to build?
We are going to build a Next.js app with Supabase, using an Edge Function to fetch data from an external API and store it in the Supabase database.
You can find the code of this tutorial in this repo.
Let's dive in!
Creating a Next.js project
The first thing we need to do is create a Next.js project. Run the following command in your terminal:
npx create-next-app@latest
This command will create a Next.js project. Just follow the steps…
For more details, see here.
Installing Supabase CLI
This command is for Windows OS. If you are using another operating system, check the Supabase documentation here.
scoop bucket add supabase https://github.com/supabase/scoop-bucket.git
scoop install supabase
Starting Supabase
Inside the Next.js project folder created earlier, run this command:
supabase init
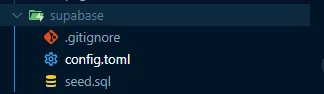
This will create a folder called supabase at the root of the project. Inside this folder you will find everything related to Supabase.
Creating Edge Function
Run the following command:
supabase functions new [function-name]
This will create a /functions folder containing all the Edge Functions you create.
I called the function get-data-api
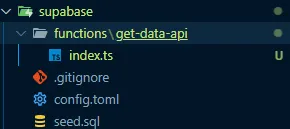
In the index.ts file is where the Edge Function logic lives. This logic can be deployed to Supabase or run locally.
Creating Supabase project
Go to https://supabase.com/dashboard and create a new project.
You will see something like this:
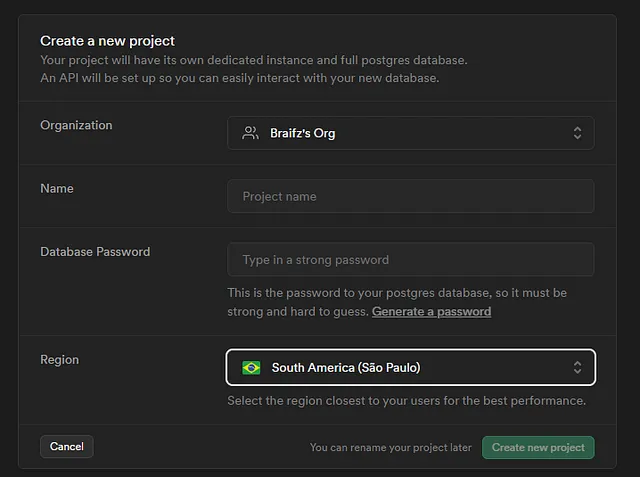
Fill in the project name and password, then create the project.
Environment variables
Now we need to save the .env in our project, go to your project settings -> API -> API Settings
You will look something like that:
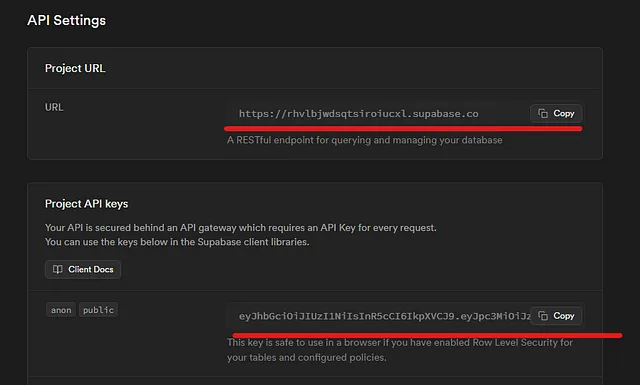
Create a .env file in the root of your Next.js project and add your keys:
NEXT_PUBLIC_SUPABASE_URL=<API_URL>
NEXT_PUBLIC_SUPABASE_ANON_KEY=<ANON_KEY>
Creating table in Supabase
Go to table editor and run this query:
create table
  public.characters (
    id bigint generated by default as identity,
    created_at timestamp with time zone not null default now(),
    name text null,
    status text null,
    species text null,
    type text null,
    gender text null,
    constraint characters_pkey primary key (id)
  ) tablespace pg_default;
This will create a table characters where we save the data
Write Edge Function
Copy this code in index.ts
import axiod from "https://deno.land/x/axiod@0.26.2/mod.ts";
import { createClient } from "https://esm.sh/@supabase/supabase-js@2.42.0";

Deno.serve(async () => {
  const supabaseClient = createClient(
    Deno.env.get("SUPABASE_URL") ?? "",
    Deno.env.get("SUPABASE_SERVICE_ROLE_KEY") ?? "",
  );
  try {
    const data = await axiod.get("https://rickandmortyapi.com/api/character");
    const characters = data.data.results;

    if (characters) {
      // deno-lint-ignore no-explicit-any
      characters.map(async (character: any) => {
        await supabaseClient.from("characters").upsert({
          id: character.id,
          name: character.name,
          status: character.status,
          species: character.species,
          type: character.type,
          gender: character.gender,
        });
      });
    }
    return new Response("Characters saved correctly!", {
      headers: { "Content-Type": "application/json" },
      status: 200,
    });
  } catch (error) {
    return new Response(String(error?.message ?? error), { status: 500 });
  }
});
Deploy Edge Function
Now we want to deploy the Edge Function we wrote and trigger it via an HTTP request.
Just write this in the command line:
supabase login
This will open your browser and login with your supabase profile
Then list your projects and select the correct one:
supabase projects list
You will see something like that

now we have the reference ID, we want to link this project for deploy our edge function, write:
supabase link --project-ref <YOUR_REFERENCE_ID>
If you are linking your project correctly, we are ready to deploy our edge function!🎉
now just write in the command line:
make sure you have Docker runnning
supabase functions deploy <EDGE_FUNCTION_NAME>
Go to Supabase dashboard and you should see your edge function deployed 🎉🎉
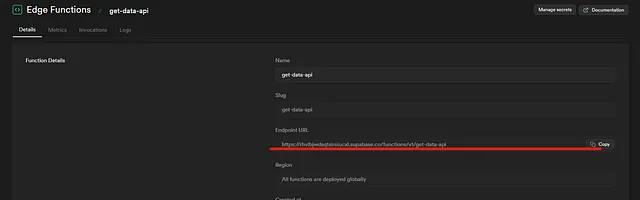
Calling Edge Function
If you go to Supabase dashboard you should see this table, make click and you can see the information about the edge function

now copy the Endpoint URL
Now make a request Http in this case I am using postman, make sure you’re putting the bearer token correctly.
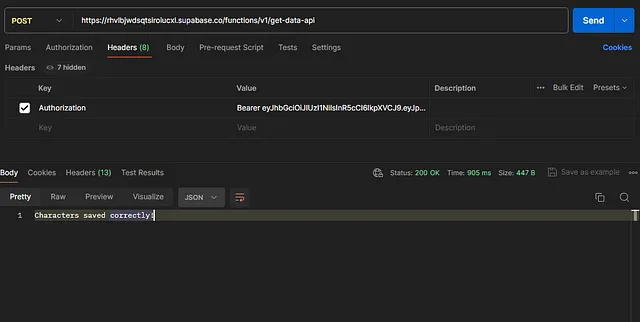
If status code is 200, congratulations! 🎉
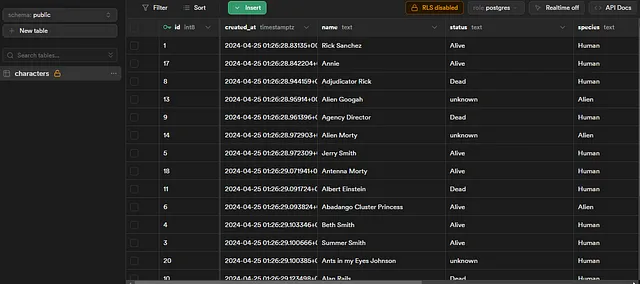
We are calling our edge function correctly, now go to Supabase dashboard!
you should see the table populated with the api data 🎉
Conclusion
The edge function have a powerful tool and you can do a lots of things
you now know how to use edge functions! 🎉
Hope you enjoy this tutorial!